


Improving Your Metal Detecting Skills


While the basics of metal detecting are simple, there are several factors you can consider to enhance your experience and enjoyment. Ultimately, the main goal when metal detecting is to find interesting items. When that doesn’t happen, the hobby can quickly become frustrating. This guide highlights a few simple tips that can help both newcomers and experienced detectorists take their skills to the next level.
1. Introduction
Lady Luck
Before reading further, it’s important to understand that metal detecting is a luck-based hobby. In practice, this means that even the most seasoned pros, equipped with top-of-the-line equipment and searching on historic land, can still come back empty-handed.
Sometimes, even the best detectorists may go out regularly for weeks or even months without finding much of historic interest. However, this is rarely the norm. By following the advice in this guide and elsewhere on this website, you should be able to find interesting items on a fairly regular basis.
Your Equipment
While newcomers may assume that equipment is the single biggest factor affecting their success, my experience suggests otherwise. While it’s true that more expensive and advanced machines can improve your finds, other factors play a much greater role. Most metal detectors—especially the well-tested models featured on this website—are perfectly capable of uncovering interesting items.
I’ve seen many detectorists spend thousands of pounds on new machines, only to find very little of interest and face the same challenges repeatedly. Although I will cover equipment in more detail at the end of this guide, there’s a good reason why it appears last on this list.

2. Learn Your Machine
Experience is Key
The single most important factor in improving your metal detecting experience is learning to understand your machine. But don’t worry—this doesn’t mean you need to master every complex setting or technical specification. Instead, it’s about familiarizing yourself with how your specific detector responds in different situations.
For some, this might involve exploring every detail of its features. But for most—especially those less technically inclined—it simply means finding settings that work well for you and learning to interpret your detector’s signals until it becomes second nature. This applies to both entry-level models and high-end machines.
While online guides and videos can be helpful, the best way to learn is by getting out and digging as much as possible.
Listen and Learn
It’s important to understand that while all metal detectors function in a similar way, each has subtle differences. This means there’s no one-size-fits-all explanation for learning how to use them. However, there are several key concepts that apply to nearly all machines on the market.
The primary way metal detectors communicate with you is through sound, making it the most crucial aspect to focus on when learning any detector. Generally, most detectors produce a range of sounds that help you decide whether or not to dig up a target. The pitch, tone, and clarity of these sounds can be influenced by the type of metal, size, shape, and depth of the object. Other factors like soil composition and electrical interference can also affect the sound.
With this in mind, you should pay attention to every aspect of the sounds your detector makes and what they might be telling you. Is the signal solid and clear, or is it weak and scratchy? Each sound provides valuable information. Different detectors vary in how they interpret signals, and some can even be customized to produce different audio responses. For example, a loud, clear, or high-pitched sound could indicate a large target, a highly conductive object, or something close to the surface. On the other hand, a low, quiet, or scratchy sound may suggest a deep or small target or the presence of iron.
The key to mastering your detector is to closely observe the relationship between the sounds it makes, what you actually dig up, and where the target is located in the soil. By consistently using the same machine or settings and paying attention to what you uncover, you will gradually develop an intuitive understanding—until interpreting signals becomes second nature.
A great way to speed up this learning process is to practice with known targets. Bury different metal objects at various depths and scan them with your detector, taking note of how the sounds change. This hands-on approach will help you recognize patterns and improve your ability to identify targets in real detecting scenarios.
Visual Representation
Most metal detectors also provide some form of visual representation of targets, usually in the form of numbers or graphs. These can offer useful information, especially when combined with audio signals. However, I generally find them to be less reliable overall. In my experience, the best detectorists rely primarily on sound, using visual information only as a secondary tool when assessing a target.
You may hear people claim that a specific number always corresponds to a particular type of find. While this can sometimes be true for shallow targets, it’s not a foolproof method. Just like sound, visual readings are influenced by factors such as target depth, shape, and soil conditions. Because of this, they should not be relied upon as completely accurate indicators.
Customisation
Almost all metal detectors offer some degree of customization through settings and options. On budget-friendly machines, this may be limited to a few preset modes, while higher-end models can have an overwhelming number of adjustable settings. These features can be beneficial, allowing you to tailor your detector to match your preferred detecting style or to optimize performance for specific soil types and conditions.
However, don’t worry if technical settings feel intimidating—most experienced detectorists have little understanding of what every setting does. Many preset programs created by other users can be found online, and most detectorists simply test a few until they find one that works for them. These settings are often shared out in the field as well, so if you’re attending an organized detecting event, chat with others using the same machine—they may have useful recommendations to help you get the best performance from your detector.
Don't Second Guess
With all this in mind, learning to use your detector may seem like a daunting task. The truth is, you will always be refining your understanding and improving your skills. However, at its core, metal detecting comes down to one simple decision: to dig or not to dig.
Your detector is only providing information to help you make that choice—it cannot tell you exactly what’s in the ground. No matter how well you know your machine, relying solely on sounds and numbers to distinguish between trash and treasure will inevitably lead to missed finds.
A common phrase among experienced detectorists is, “If in doubt, dig it out.” This is excellent advice for everyone in the hobby. Even seasoned detectorists are often surprised by what they uncover, proving that you never truly know what’s hidden beneath the surface until you dig.
Iron out The Issues
The only type of target you should aim to avoid regularly is iron (and coke/coal on some machines). While it’s true that some historic finds—like weapons and armor—are made of iron, the reality is that 99.9% of iron objects found in the ground are scrap. Most historic iron artifacts have long since deteriorated, so it’s best to avoid digging them up, allowing you to focus on more promising targets.
For any detectorist looking to improve their finds, the most important skill is learning to recognize when you’re detecting iron so you can avoid it. While it’s nearly impossible to filter out iron 100% of the time—and some detectors are better at indicating a likely ferrous target than others—most machines give subtle clues in their readings that you can learn to interpret with practice.
Exceptional Circumstances
There are a few exceptions to avoiding certain targets that are worth considering. Some farms or fields may be heavily contaminated with specific types of metal waste. If you consistently find yourself digging up the same type of rubbish with similar readings each time, it may be worth trying to avoid those signals. The two most common types of metal waste detectorists encounter are “green waste” and tin foil, often found on dairy farms.
Green Waste
Green waste comes from contaminated fertilizer that has been spread over fields. It typically consists of large pieces of aluminum from old doors and window frames, as well as copper door knobs and handles. These materials often produce very loud or high readings, which can sometimes be avoided, as very few valuable finds fall into that range. However, fields with green waste may also contain a lot of screws and furniture fixings, which sound very similar to good targets and are much harder to filter out.
Tin Foil
Foil is another common nuisance, often found in dairy farm fields. It usually produces very low or faint signals. If you detect in a field full of foil, you may be able to ignore these signals, as not many valuable finds tend to register in the lower ranges of a metal detector.
Moo Tubes and Shotgun Shells
You will also likely encounter fields littered with bullets, shotgun shell caps, or mastitis tubes (small aluminum tubes resembling superglue containers), which are humorously referred to as “moo tubes” in the detecting community. Unfortunately, both moo tubes and shotgun caps are extremely common, and their signals are identical to many valuable finds. While this can be frustrating, the only real solution is to dig them up and hope for the best.

3. Improve Your Technique
Swing Low and Slow
There are a few common mistakes in technique that many detectorists make time and time again. And this doesn’t just apply to beginners—many experienced detectorists develop bad habits too. One of the biggest factors affecting your success is how you swing your detector.
Your metal detector works by sending a signal into the ground that reacts to metal. To maximize your chances of finding targets, you need to cover as much ground as possible with your coil. While it might seem logical to move quickly across a field, swinging fast is actually one of the easiest ways to miss valuable finds.
The signal from your coil extends into the ground in an upside-down cone shape. While your search coil covers a wide area at the surface, deeper targets may not register unless you pass the center of the coil directly over them. Additionally, metal detectors are small computers, constantly scanning the ground and feeding information back to you through audio and visual signals. This feedback is not always instantaneous, so swinging too quickly may not give your detector enough time to properly process targets.
Taking this into account, the best advice I can give is to swing your detector low and slow. Metal detectors rely on conductivity, and soil is much more conductive than air. Keeping your coil as close to the ground as possible allows your machine to penetrate deeper, improving your chances of locating buried targets. Moving slowly ensures your detector has enough time to register and accurately process signals.
If you think you hear a faint signal, swing over the spot multiple times from different angles. You’ll often find that a weak signal improves when the machine scans the same location a few times.
If you’re naturally a fast walker (like me), slowing down can take some self-discipline. One trick I use is to imagine I’m painting the ground with my coil, making sure I cover every inch. This helps me stay focused and ensures I don’t miss anything.
Getting Into the Swing of Things
The way you swing your detector also has a huge impact on your success, for the same reasons described above. One of the most common mistakes I see in the field is people swinging their detector incorrectly. This usually happens when they move the coil in a “U” shape in front of them, causing it to lift off the ground at the ends of each swing.
This mistake significantly reduces your chances of finding targets because it means you’re only properly scanning the patch of ground directly in front of your feet. A coil does not detect effectively when angled or lifted off the ground, and it performs even worse when passing through the air instead of soil.
To maximize coverage and accuracy, the best practice is to keep your coil perpendicular to the ground at all times and swing it in a “C” shape around your body. This ensures that you’re properly covering the ground to your left and right as you walk, improving your chances of detecting targets that you might otherwise miss.
4. Understand the Terrain
Introduction
The type of land and soil conditions can have a huge impact on metal detecting, so it’s important to take these factors into consideration to maximize your success. There are many different conditions you might encounter, each affecting your detector in unique ways—you could probably write a whole thesis on the subject! However, I’ll cover some basic pointers below that should be useful to everyone.
It’s important to remember that these factors will affect different detectors in different ways. The best way to truly understand how your machine responds to various soil types is to get out in the field and gain as much hands-on experience as possible.
Wetter is Better (mostly)
The first factor to consider is moisture levels. Metal detectors rely on conductivity to detect targets, and because water is a conductor, moist ground enhances detection depth and signal clarity. In practice, this means your metal detector will perform better when the ground contains moisture, making it easier to pick up deep or faint signals.
However, this also means that detecting can be more challenging in the summer months when the soil is dry. During hot, dry periods, it’s common to notice a drop in your find rate. Most detectors also struggle more with hard, compacted ground compared to soft soil, making it even more difficult to locate targets. When you add in the physical strain of digging in tough soil and walking long distances in the heat, it’s no surprise that many detectorists reduce their time in the field during extreme summer conditions.
If you are detecting in very dry soil, be aware that signals may sound weaker or scratchier than usual. Slowing down and listening carefully can help you pick up targets that might otherwise be overlooked.
While moisture generally improves detection, too much water can also cause issues. Extremely wet ground, especially in mineralized soil, can create interference and make signals harder to interpret. It can also be frustrating to recover small finds in muddy conditions—digging through a water-filled hole in freezing weather is no fun!
Metal detecting is possible year-round, but extreme conditions will almost always reduce your success rate. In my experience, the best times to detect are Spring and Autumn, when the ground is soft but not too wet, and conditions are generally more comfortable.
Soil Type and Conditions
There are many different soil types you may encounter, and even similar-looking soils can have slightly different compositions. These variations can have a subtle effect on your metal detector’s performance. Harder ground, such as clay soil or areas with a lot of stones, can reduce detection depth. Just as with dry, compacted soil, it may help to slow down and listen carefully for scratchy or faint signals in these conditions.
It’s also important to consider that historic finds can be buried very deeply, especially in areas where the ground has never been turned, such as soft or boggy land. In these places, it’s possible that some artifacts may be out of your detector’s depth range. Pay close attention to where your finds are located in the soil and whether certain time periods are consistently appearing at the same depth. For example, if all your Georgian finds are coming up extremely deep, you may struggle to locate much older artifacts in that area simply because they are buried even further down.
Some ground, especially beaches, can contain high levels of minerals such as iron. While some metal detectors handle mineralized ground better than others, most machines will struggle to distinguish clear signals in these conditions. As with most of the challenges mentioned earlier, if you feel like your detector is having difficulty, the best approach is to swing low, swing slow, and listen carefully.
Many high-end metal detectors also offer a “ground balance” feature. This function requires you to swing your coil over the ground a few times while the machine analyzes and adjusts to the soil conditions. How useful this feature is depends entirely on the type of ground—it can make a big difference in some cases, but in my experience, the improvement is not always dramatic.
The Grass Isn't Always Greener
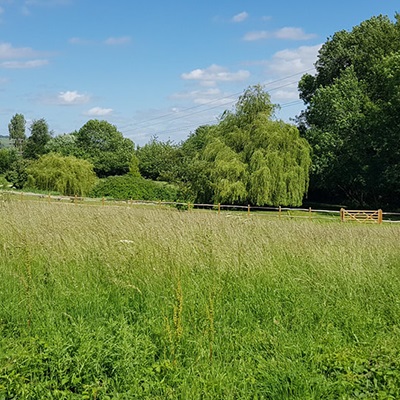
There are several different types of fields you may find yourself detecting on—stubble, grass, planted fields, and more. Each presents its own challenges and may require you to adjust your metal detecting technique.
Since it’s always best to keep your coil as close to the ground as possible, flat, bare earth is the easiest to detect on. If the ground is furrowed (such as in potato fields), walking across the furrows rather than along them helps keep your coil lower where the ground dips. Ploughed fields can be good for detecting, but be cautious on very soft or wet soil, as it can be treacherous, and you may find yourself sinking deeply. Some detectors also struggle to get good depth on highly aerated ground, though freshly turned fields do offer the advantage of bringing buried finds closer to the surface.
Pasture is great for detecting, but naturally, the longer the grass or crop, the harder it will be to swing your coil and locate targets. Woodland can also be especially challenging, as you may need to dig through roots or even beneath them to retrieve a target.
Autumn is prime time for metal detecting, as most arable fields have been harvested and are left unused, providing plenty of opportunities to explore. You’ll likely encounter different types of stubble, each with its own characteristics.
- Cereal crops (wheat and barley) can be great for detecting, but fresh stubble can be frustrating as it catches on your coil. You may lose some depth by swinging just above it, but this will save your arms from unnecessary strain. As the stubble rots down over winter, it becomes much easier to work through.
- Maize stubble is often disliked by some detectorists, but I personally love it because it allows you to get close to the ground. Since maize is planted in wide, even rows, I find it best to walk across the rows and swing my coil as straight as possible to maximize ground coverage. Some detectors even have small coils that can fit between the stalks for better maneuverability.
- Oilseed rape stubble is difficult to detect on unless it has been cut extremely short. The stalks are very tough and spread across the entire field, constantly catching on your coil and making movement frustrating. Personally, I tend to avoid it.
Beaches are a special type of terrain, and whether or not your detector performs well there depends largely on the machine itself. Many beaches contain highly mineralized sand, which can interfere with signals. Multi-frequency metal detectors generally work best in these conditions. While it’s possible to detect on beaches using cheaper or non-specialized machines, they often struggle to lock onto signals and tend to be noisy or chattery. If you plan to detect on beaches regularly, it’s worth investing in a machine designed for the task.
5. Research Your Land
Knowledge is Key
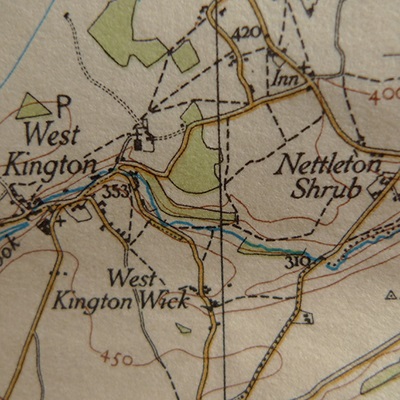
Whether you’re detecting on your own permission or attending an organized event, a little prior research can go a long way in improving your finds. You can find a detailed guide to researching land on this website, but here are a few key points to get you started. Understanding where finds are more likely to appear gives you a great starting point, and once you uncover artifacts from a particular historical period in an area, chances are there will be more to discover nearby.
It’s important to remember that not all land is equal when it comes to finds. At the end of the day, if the artifacts aren’t there in the first place, you won’t be able to find them. You may come across one farm rich in history, while a neighboring farm yields very little. It’s also not uncommon to find a historically significant field while the adjacent fields remain quiet. That said, we are fortunate to have a long, rich, and varied history, meaning interesting finds can turn up almost anywhere.
It’s always worth checking with the landowner to see if the land has been searched before and, if so, what was found. While previously detected land may be quieter than undetected land, that isn’t always the case. If others have found interesting artifacts there—especially on land that gets ploughed regularly—it’s still worth searching, as ploughing often brings new finds to the surface. Land is rarely searched completely, and there is almost always more to be found. In fact, many of my best finds have come from fields that had already been detected by others.
Known History
The first place I usually start when researching an area is its known history. If there are important historical sites nearby, such as castles, early settlements, or manor houses, this is usually a great sign. However, don’t be discouraged if none of these are present—there may still be plenty of history in the area. It’s also worth looking at nearby buildings and their age. The presence of timber-framed or stone-built structures can indicate a long history of human activity.
Religion played a central role in the lives of our ancestors, so churches can be valuable research points when assessing an area’s historical significance. The history of most churches is well-documented, so a quick Google search should provide details about their age and importance. If you’re lucky enough to have permission to detect near a church, these areas often yield fantastic finds. Churches were community hubs, hosting events and weekly gatherings, meaning a significant number of people would have traveled through or spent time nearby.
It’s also important to consider footfall—the more people that passed through an area, the higher the chance of finding lost objects. Fields closer to towns or villages, particularly those with historical significance, are more likely to contain artifacts. However, even if your land is far from modern settlements, it may have still experienced considerable foot traffic. Our ancestors spent much of their time outdoors, traveling on foot or horseback, so areas with old footpaths can be surprisingly productive.
The edges of rivers and streams are also worth exploring, as people often traveled alongside waterways to reach safe crossing points. If you don’t mind occasionally digging up discarded modern rubbish, roadside fields can also be productive, as many of today’s roads were once ancient footpaths or trackways.
Finally, watch for signs of medieval field workings, such as ridge and furrow patterns. Many people spent their days working in the fields, increasing the likelihood of lost items from past centuries.
Unknown History
Even if you can’t find any obvious signs of history, that doesn’t mean it isn’t there. Much of the land has been worked and cultivated for centuries, and as a result, a great deal of history has been lost to the plough. The idea of preserving history is a relatively recent concept. In the past, grave sites were looted for their riches, monuments were stripped for building materials, and many old structures were demolished or built over. Additionally, early buildings made of earth or wood have long since decayed, leaving little visible trace of their existence.
A huge part of the excitement and fascination of this hobby is the thrill of uncovering the unknown. Few things compare to the excitement of stumbling upon an undiscovered Roman site or identifying a forgotten medieval market field.
Ultimately, the best research tool is your metal detector. Spending a few days detecting on a field will give you a strong sense of what may be buried beneath. Over time, as you gain experience, you’ll begin to develop a sixth sense for where finds might turn up. But even then, this hobby is full of surprises, and you’ll be amazed at what unexpected treasures emerge in the most unlikely places.

6. Consider Your Equipment
When Investment Pays
Your equipment can also play an important role in maximizing your potential finds, though this largely depends on what metal detector you’re using and where you’re detecting. While it’s true that more expensive metal detectors offer better performance, there is a point of diminishing returns. If you’re using a basic entry-level machine, upgrading to a mid-range or high-end detector will make a significant difference. However, the improvement between a £500 machine and a £1,000 machine is much more subtle and nuanced.
There are a few key advantages that higher-end machines provide. One of the biggest is their ability to better discriminate between unwanted iron and valuable targets. While most detectors offer some level of discrimination, premium models tend to perform this function more accurately. They may also be capable of detecting deeper targets and picking up smaller objects with greater sensitivity.
That said, don’t assume you need an expensive upgrade just because you haven’t found much lately. If you already have a decent machine, the best way to maximize your success is to learn it inside out. I’ve seen countless detectorists spend thousands on the latest high-end models, only to sell them at a loss a few months later and return to their cheaper, more familiar machines. And remember—even the best detector in the world won’t help if you don’t walk over the right target!
There are some situations where investing in specialized equipment makes sense—beach detecting is a prime example. If your detector isn’t designed for beach use, no amount of adjusting the settings will make it work properly. In this case, you’ll need to invest in a machine that can handle wet, mineralized sand to get the best results


